We decided to do a chicken mummy this year while studying about ancient Egypt. I read a few of the "recipes" online, but I decided to go with the directions found in the activity book that goes along with The Story of the World.
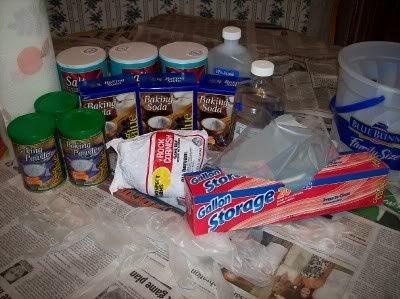
We used lots of gallon-sized baggies, gloves, rubbing alcohol, lots of paper towels, salt, baking soda, baking powder, and of course a chicken. To make the baggie stand up, I clipped it inside and ice cream bucket with clothespins. We found we needed a lot more salt, and some more baking soda and baking powder for the later stages, but this amount was a good start.
The chicken is a small Rock Cornish Hen that we got in the freezer section of the store and thawed in the refrigerator for a couple of days. A small chicken takes less salt and stuff. We named her "Henshepsut" after Hatshepsut, who was the first female pharaoh. (I voted for "TutenkahmHen," but I was outvoted!)
To start with, we rinsed Henshepsut very well, finishing up with rubbing alcohol. Then we dried her with paper towels, inside and out.

Then we mixed two containers of table salt with 1/2 box of baking soda and 1/2 can of baking powder. This is supposed to be close to the natron that the ancient Egyptians would have used.
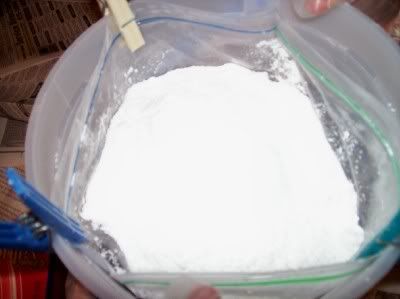
We put some of this mixture in a plastic zipper bag, put the chicken in upside down and filled the cavity with the salt mixture. Then we poured the rest of the salt mixture in around her. We zipped the bag and put it inside a second bag with her name written on it. This part is important later on.
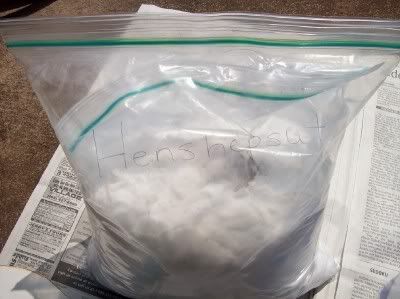
To change to fresh salt, we put on gloves, take Henshepsut out of the old salt mixture and dust her off. We have always have to push the salt out of the inside cavity because it becomes moist and clumps up in there a bit. Then we put her in a new bag and follow the same procedure that we did at first, filling her up with more salt and pouring salt all over her. Last, we always double bag, using the outside bag with her name on it.
Once, I almost threw her away, thinking I was disposing of the bag of old salt. Luckily, I realized it in plenty of time. So that is why it is important to have the one bag with her name on it. She is always kept in that bag, and you make sure not to throw it away.
We started out changing the salt mixture every day. After 5 days, we went to every other day because the salt was not getting all that moist. Now we are changing every five or six days. On one website, we read that the smell was very bad, but that must have been because they were not changing the salt often enough. Henshepsut has never had a stinky smell. She has a kind of "greasy chicken" smell, but it is not strong, and she smells more like leftovers than anything.
We have not finished our "mummification" process yet. We will update when we are finished. We are preparing some oil that is full of cinnamon and cloves, and it smells great. We'll rub that in, and wrap her up in cloth bandages. We need to make her a little sarcophagus too.
Please leave a comment if you've done a "mummy" project like this! Or if you're just thinking about it...